Building and Designing Landing Pages
Landing pages collect signups and add each response directly to your Database as a new contact. This article walks through creating a landing page and designing it in the drag-and-drop editor.
If you’ve already created your landing page and need help designing it, skip to Designing Your Landing Page.

Creating a Landing Page
To create a landing page, click Growth in your toolbar, then select Create Landing Page. If this is your first landing page, you will see an empty state indicating that no landing pages exist yet. Click Create Landing Page to open the creation form.

Fill in the following fields:
- Landing Page Name: A label for internal reference. This name also auto-populates the Landing Page URL field.
- Source: Select the source that describes how visitors will reach this page (for example, a specific campaign or channel).
- Landing Page URL: This field is automatically populated using the Landing Page Name. You may change it before creating the page. Oomiji-hosted pages use the format: https://oomijiapp.com/acquire/[page-name].
- Redirect URL: The URL visitors are sent to after submitting the form.
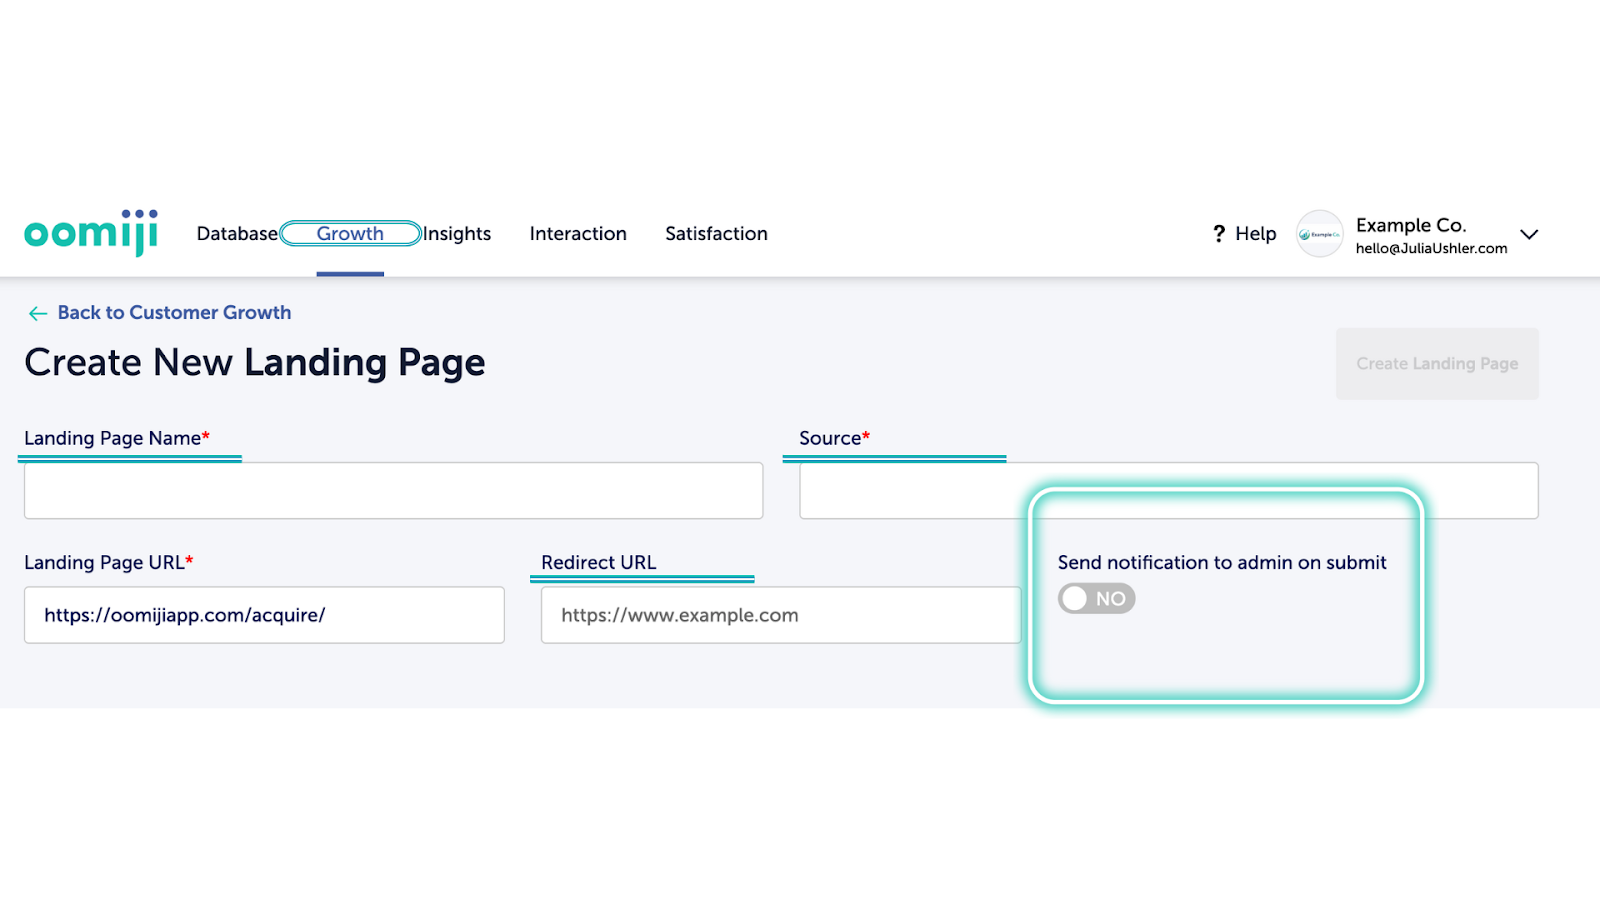
Send Notification to Admin on Submit: When toggled on, Oomiji sends an email notification to the account owner’s email (the address used to sign up for Oomiji) each time a visitor submits the form. This is useful for time-sensitive campaigns but can generate a high volume of emails if the page receives heavy traffic.
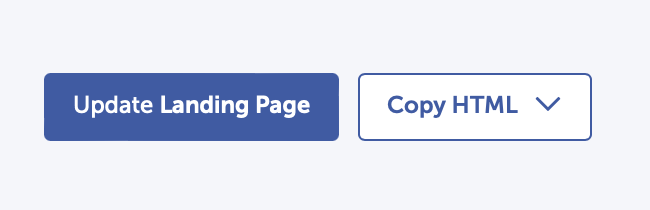
To finalize creation:
- Click Create New Landing Page in the upper-right corner
- The page will refresh and display a success message
- The button will change to Update Landing Page
- A Copy HTML button will appear
Your landing page is now live and collecting responses. Each submission automatically creates a contact record in your Database, and you can track signups over time from the Growth dashboard.
The fields that appear in each contact record depend on the questions you include in your form (see Designing Your Landing Page).
Landing pages are one of several ways contacts enter your Database. To add contacts in bulk from an existing file, see Importing Contacts into the Database.
Because every form submission creates a contact record, a well-designed landing page is one of the most direct ways to grow your Database with engaged, consenting contacts.
Designing Your Landing Page
After creating a landing page, you’ll see the drag-and-drop editor. Everything you build is created using Content Blocks, which you drag from the panel on the right side onto the canvas. For first-time users, it helps to think of blocks in four categories: structure, text, media, and interaction.
Which blocks you choose determines what your visitors see and what data you collect, so it’s worth understanding what each one does before you start building.
Structure Blocks: Shape Your Layout First
These blocks control how content is arranged on the page.
Tip: Start with structure blocks before adding detailed content. They make everything easier to organize later.
- COLUMNS: Creates multiple columns inside a section. Use this when you want content side by side, such as text next to an image.
- DIVIDER: Adds a horizontal separator that you use to visually separate sections as your layout grows.
- TABLE: Creates a grid of rows and columns and is best for structured information like comparisons or lists of data.

Text Blocks: Add Written Content
These blocks are for the text your visitors will read.
- HEADING: Adds a title or section header with a larger, bolder style. Use this for the main message at the top of your page or to label distinct sections.
- PARAGRAPH: Adds a standard text area for body copy. When you click into a Paragraph block, a formatting toolbar appears with options for bold, italic, underline, strikethrough, text color, background color, subscript, superscript, emoji, bulleted and numbered lists, and link insertion. The right panel also lets you adjust Font Family, Font Weight, Font Size, Color, Text Alignment, Line Height, and Letter Spacing for the selected block.
Media Blocks: Add Visual Content
These blocks let you include images or videos.
Tip for first-time users: Start with IMAGE blocks before exploring carousels or video.
- IMAGE: Adds a single image to the layout. Must be under 10 MB.
- CAROUSEL: Adds multiple images in a rotating or scrollable format.
- VIDEO: Embeds video content hosted on YouTube or Vimeo. It will automatically generate a preview image which links to the provided URL.

Add Buttons and Interactive Elements
Interactive blocks guide visitors to take action. On a landing page, the Form block is especially important because it’s the mechanism that captures visitor submissions.
- BUTTON: Adds a clickable call-to-action. Commonly used to encourage signups, downloads, or navigation. Oomiji offers multiple button styles that can be customized after placement.
- FORM: Adds a form for collecting information such as names or email addresses or primary interests. On a landing page, the Form block is how visitor submissions are captured. Each submission automatically creates or updates a contact record in Database.
- SOCIAL: Links to 30+ social platforms, from Instagram to Discord, connecting your visitor base to your social presence.
- MENU: Adds a navigation-style menu with links.
- UNSUBSCRIBE: Creates an unsubscribe element. Usually required in email layouts and typically placed near the bottom. Less common on landing pages but available if needed.
- HTML: Opens a code editor where you can write or paste custom HTML directly. The editor shows line-numbered code on the right panel and renders the output on the canvas in real time. The HTML block also includes Desktop and Mobile tabs, letting you write different code for each view, and its own Container Padding control under the General section. This is intended for advanced users who need functionality beyond what the standard blocks provide.

Styling Your Landing Page
Once blocks are in place, you can customize the overall look and feel of your landing page by clicking BODY on the right side of the editor.
Consistent styling builds trust with visitors and increases the likelihood they’ll complete your form, so these settings are worth adjusting even if the defaults look acceptable.
- Text Color: Sets the default text color across the entire landing page.
- Background Color: Changes the background color of the landing page. This is often the first thing a visitor notices, so choose a color that matches your brand.
- Font Family and Font Weight: Adjusts the typeface and weight (e.g., Regular, Bold) across the page. Choose fonts that are easy to read and consistent with your brand’s style.
- Content Width: Controls how wide the content area is (default is 500 pixels). Wider layouts suit image-heavy pages; narrower layouts keep text focused and readable.
- Content Alignment: Sets whether content aligns to the left or center of the page.
- Links Color: Sets the color for any hyperlinks on the page.

Container Padding
Container Padding creates a buffer between the edge of a section and what’s inside it, like text, images, or buttons. Without padding, content can feel crowded or harder to scan, especially on mobile. You can set padding for all sides at once or adjust each side independently using the More Options toggle.

Once you have a design you like, you can copy it and adjust the name, source, and URL for a different campaign rather than starting from scratch each time.
What’s Next
- Sharing Landing Pages
- Embedding Landing Page Form on Your Website
- Landing Page Best Practices and Common Mistakes covers design and strategy guidance for creating effective landing pages.
- Primary Interests: Foundational to Segmentation explains how to use the Primary Interest field, which can be included as a form question on your landing page.
- Managing Landing Pages covers how to view, edit, copy, import contacts into, and delete your landing pages after publication.