Importing Contacts into the Database
This article walks through how to prepare your contact file and import it into the Database. After completing these steps, your contacts will be in the Database and ready for segmentation, list building, and outreach through Interaction.
#1: Before You Import- Upload Your Suppression List
If you have used another system to send marketing emails, download your suppression list from that platform, then upload the suppression list before importing your contacts. Importing contacts before uploading your suppression list may result in marketing emails being sent to contacts who have previously opted out.
For details, refer to Manage Your Suppression List. Starting with a current suppression list ensures every contact you import is eligible to receive communications.
#2: Review the Data You Plan to Import
Before importing your list, review all fields you have collected and confirm they are useful for your digital marketing efforts. You can compare your columns to the downloadable template available on the Upload File screen (Step 5) to see which fields the Database expects.
For example, you may have full mailing addresses. In a digital marketing platform, you may choose to import only the postal code instead. The Oomiji platform automatically processes postal codes and assigns the correct city, county, state, and region for addresses in the United States. Support for additional countries is planned and specific countries can be prioritized upon request.
#3: Set Up Standard and Custom Fields
The Database includes standard fields (built into every Dashboard and cannot be deleted or renamed) and custom fields (user-defined, maximum of 25).
If you have customer information that does not match a standard field, you can create custom fields. The Database supports a maximum of 25 custom fields. If your file contains more than 25 columns of non-standard data, decide which fields to import before uploading. You will see this limit noted again on the Upload File screen.
During the import process, you can select 'Ignore Column' for any columns you do not want to import (see Step 6).
You can read more in: Setting Up Standard and Custom Fields in the Dashboard
It is recommended to review and configure fields before importing to help ensure clean data. However, fields can also be created during the import process.
#4: Prepare Your File Format
Before uploading, ensure your file is saved in CSV format and review your data for formatting consistency.
- If you have a date column, ensure all dates follow the same format. For example, use 01/01/2022 consistently, not mixed with January 1, 2022.
- If you have a Yes/No field, use only Yes, No, or leave blank. Do not use alternate terms.
The platform has been tested with lists of up to 100,000 contacts.
Once your file is clean and consistent, you are ready to import.
Consistent formatting at this stage prevents field-matching errors during import, which directly affects the accuracy of any segments or reports you build from this data.
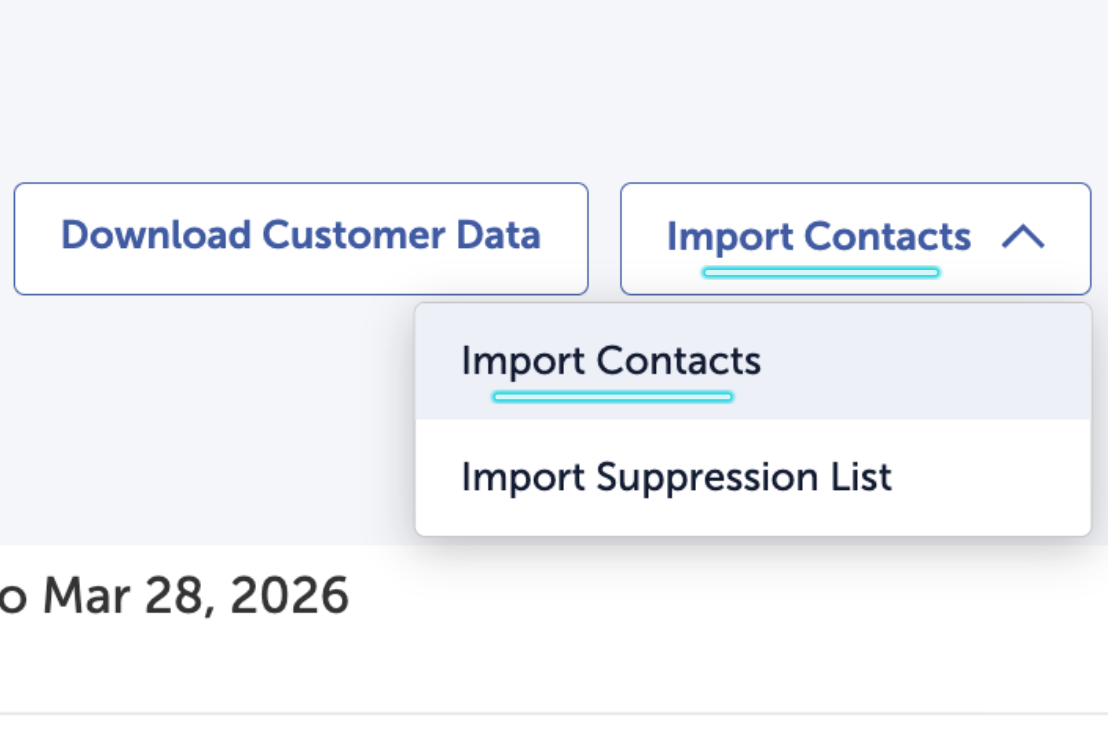
#5: Importing Contacts
To begin the import:
- Navigate to the Database section
- Click Import Contacts in the top navigation bar
- Select Import Contacts from the dropdown
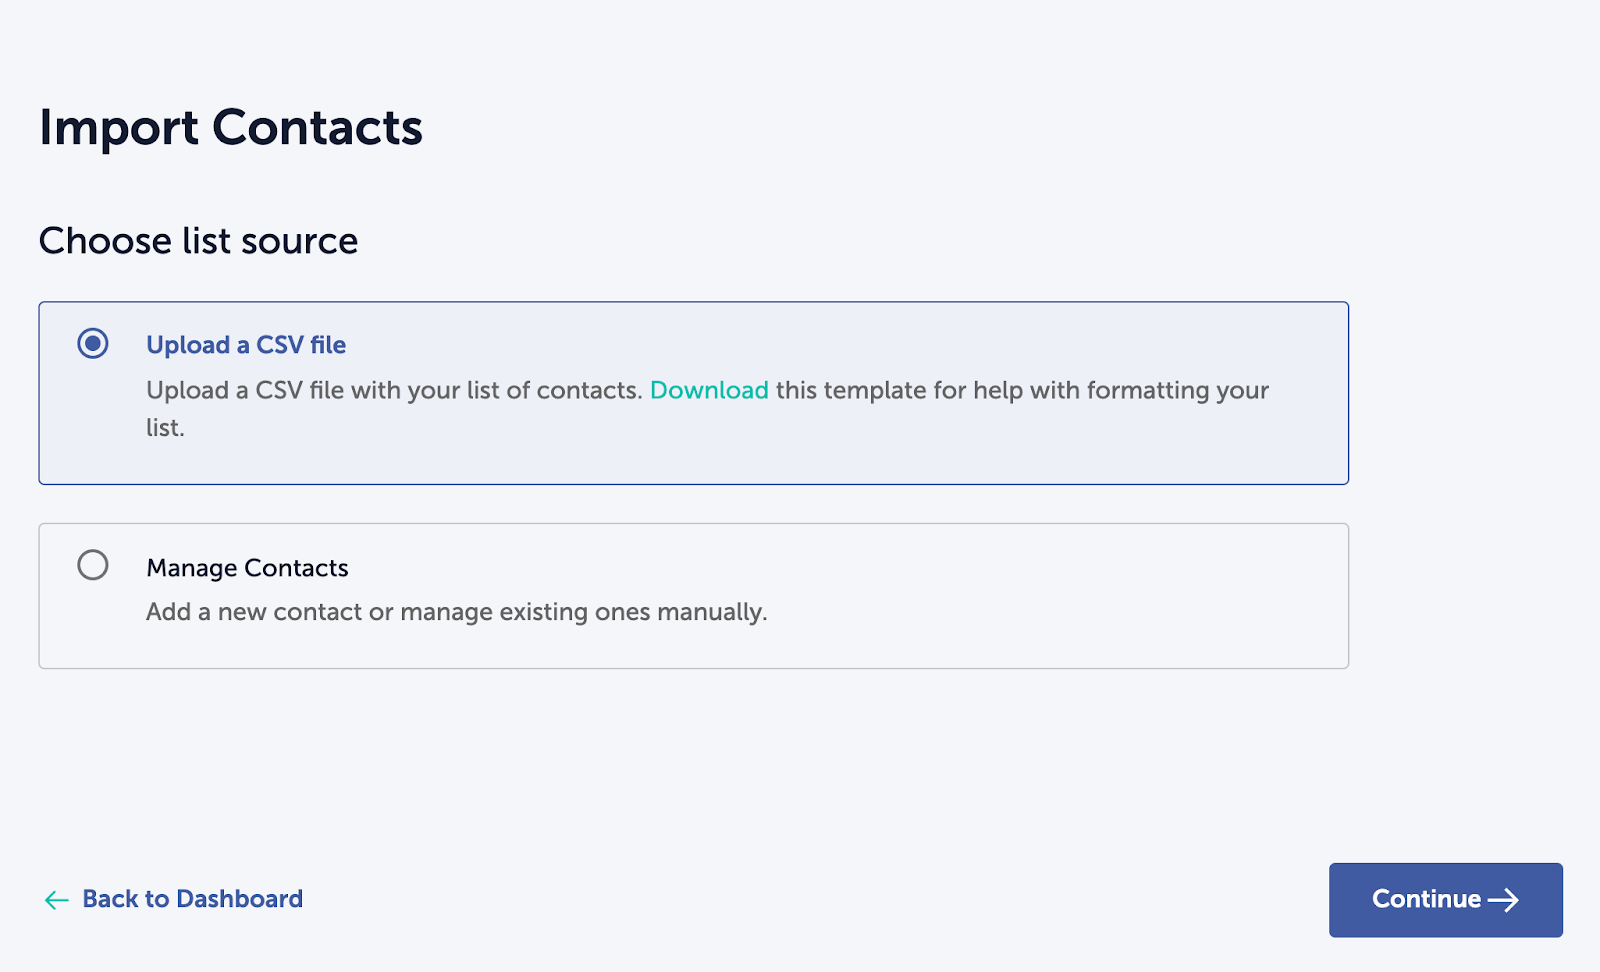
Once you click Import Contacts, you will see two options:
- Upload a CSV file is used for importing large lists of contacts. The Upload File screen includes a downloadable template to help format your file correctly. If you are preparing a CSV for the first time, we recommend using this template.
- Manage Contacts is used for adding individual contacts manually or editing existing contact records.
Select Upload a CSV file and click Continue. On the next screen, drag your CSV file into the upload area or click to browse for it on your computer.
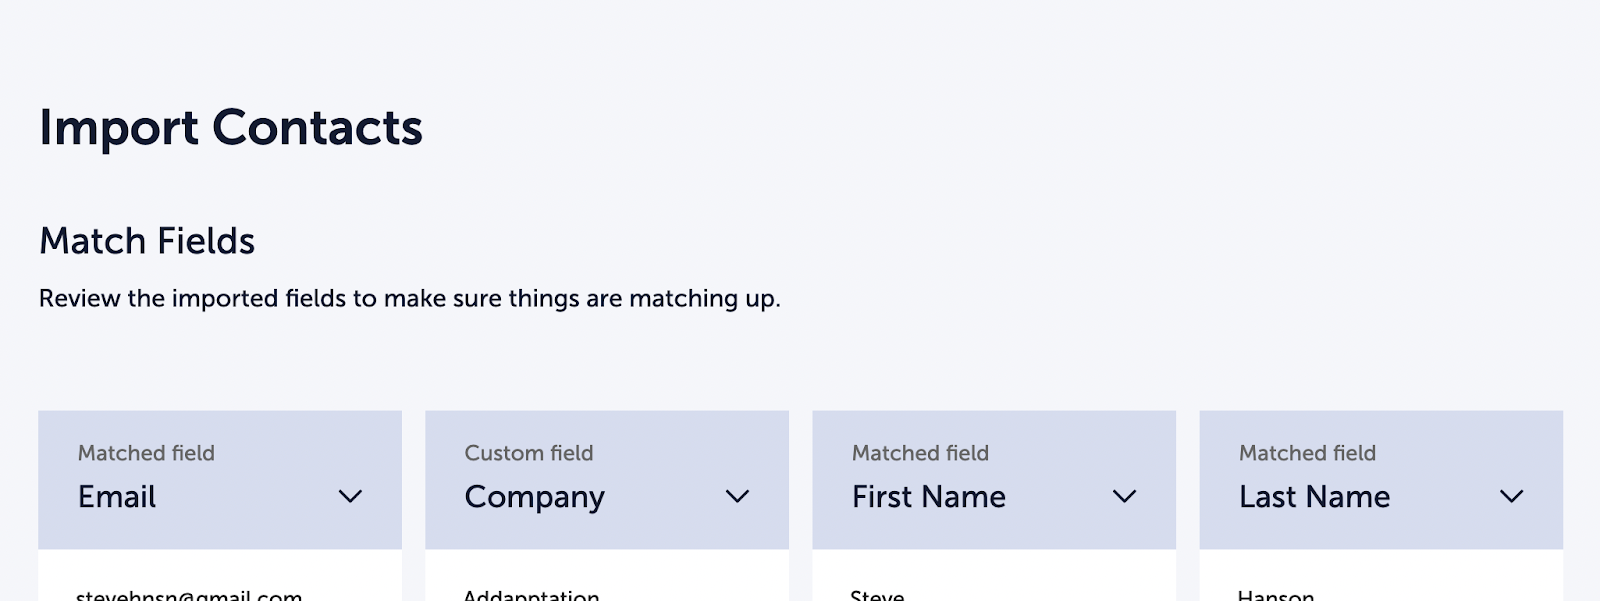
#6: Upload and Match Fields
After uploading your CSV file on the Upload File screen, the system reads your column headers and attempts to match them to existing Database fields (standard or custom).
Blue header means the field was matched automatically because the column name in your CSV matches an existing field name in the Database.
Orange header means the field is unmatched. You will see a label that reads "(unmatched field)."
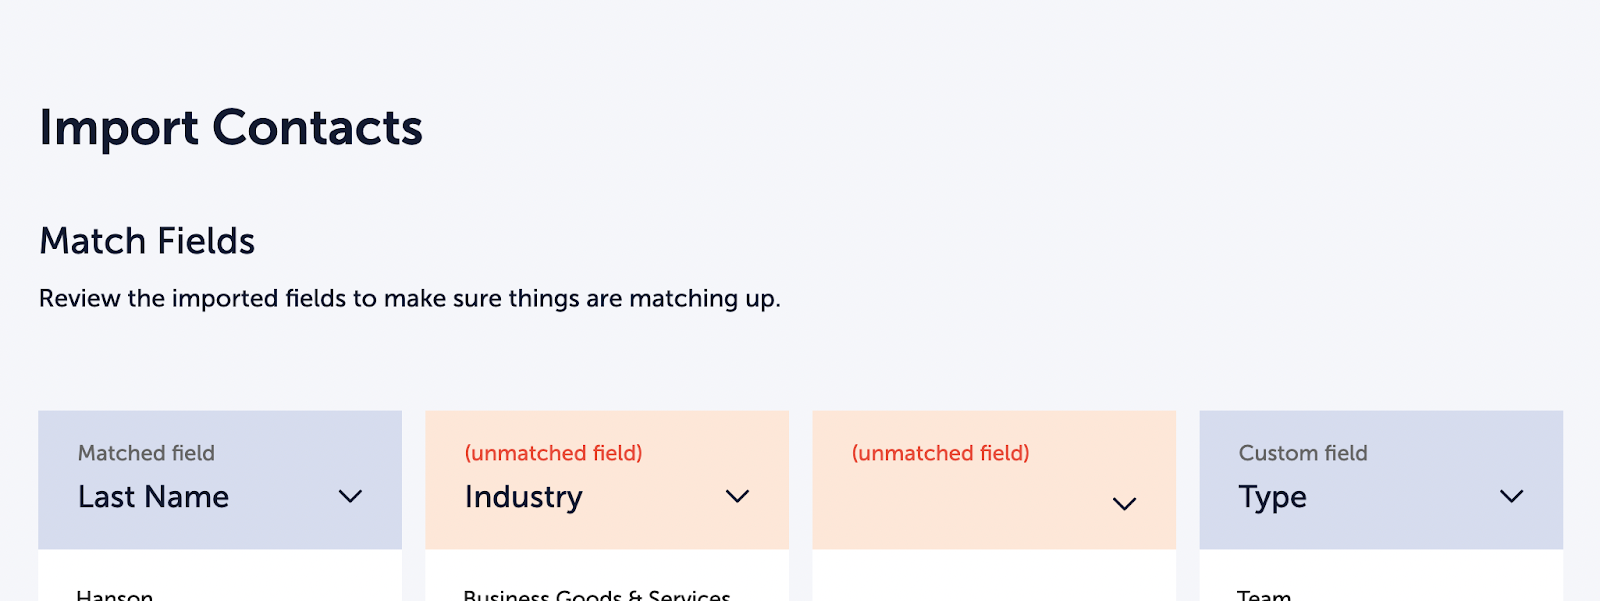
To resolve an unmatched field, click the arrow next to the field name. From the dropdown, you can select an existing field from the list, create a new custom field, or select "Ignore Column" to skip the column entirely. Ignoring a column is useful if your CSV contains data you do not want to import or if you have reached the 25 custom field limit.
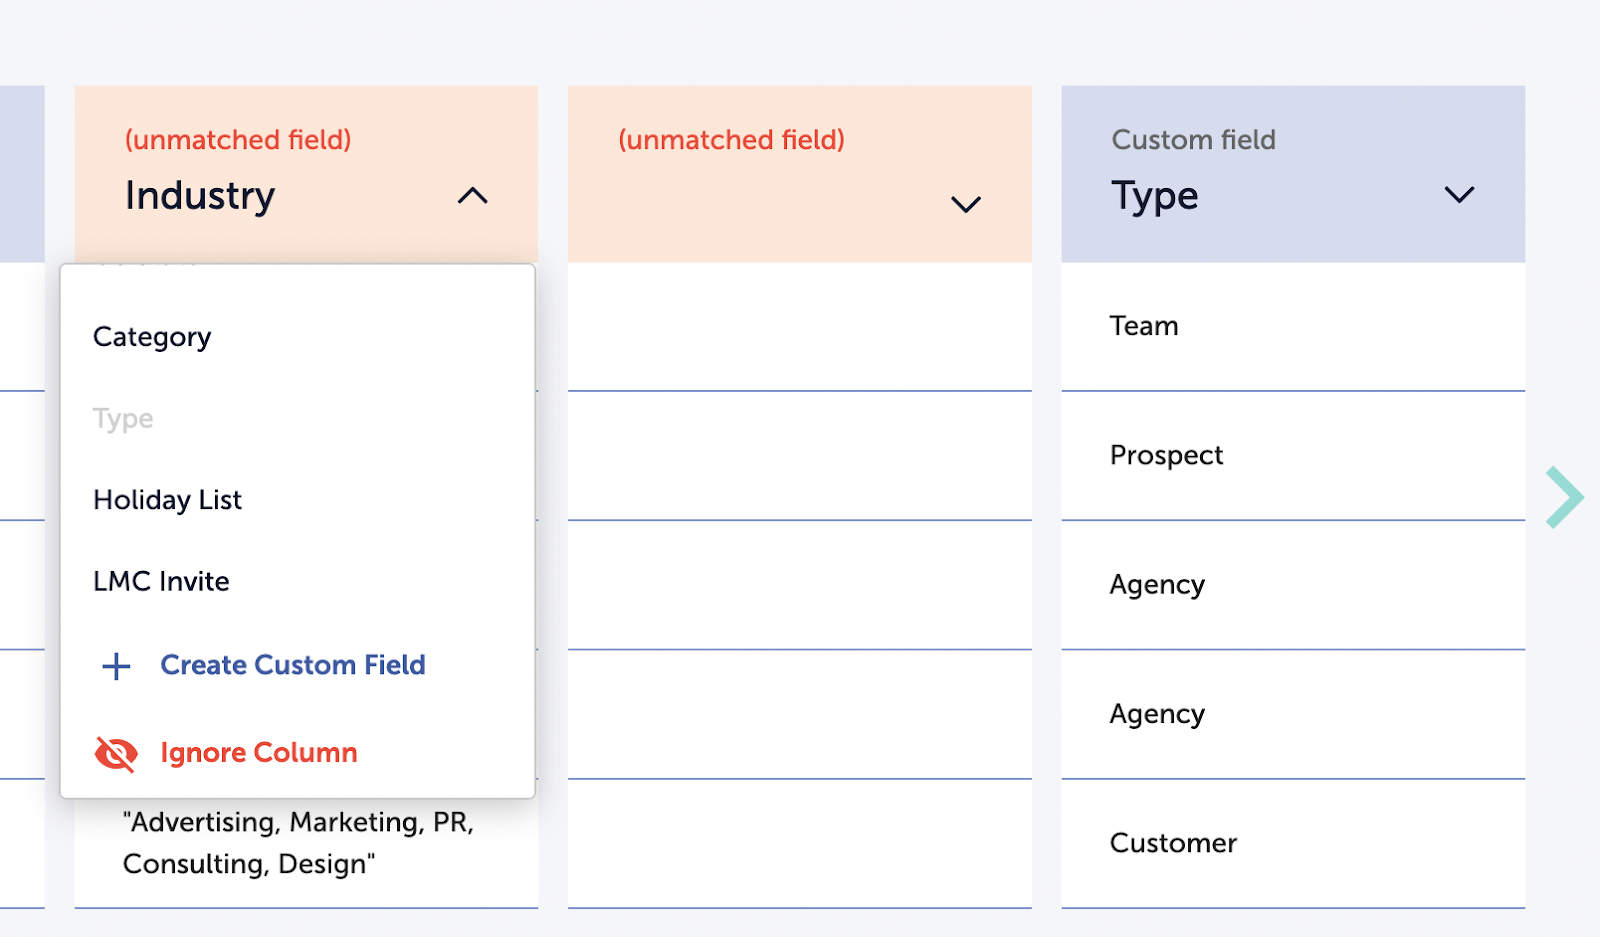
Once all fields are either matched or ignored, the Continue button turns blue. Click Continue to proceed. Accurate field matching at this stage determines how your contact data appears in segments, filters, and reports throughout the platform.
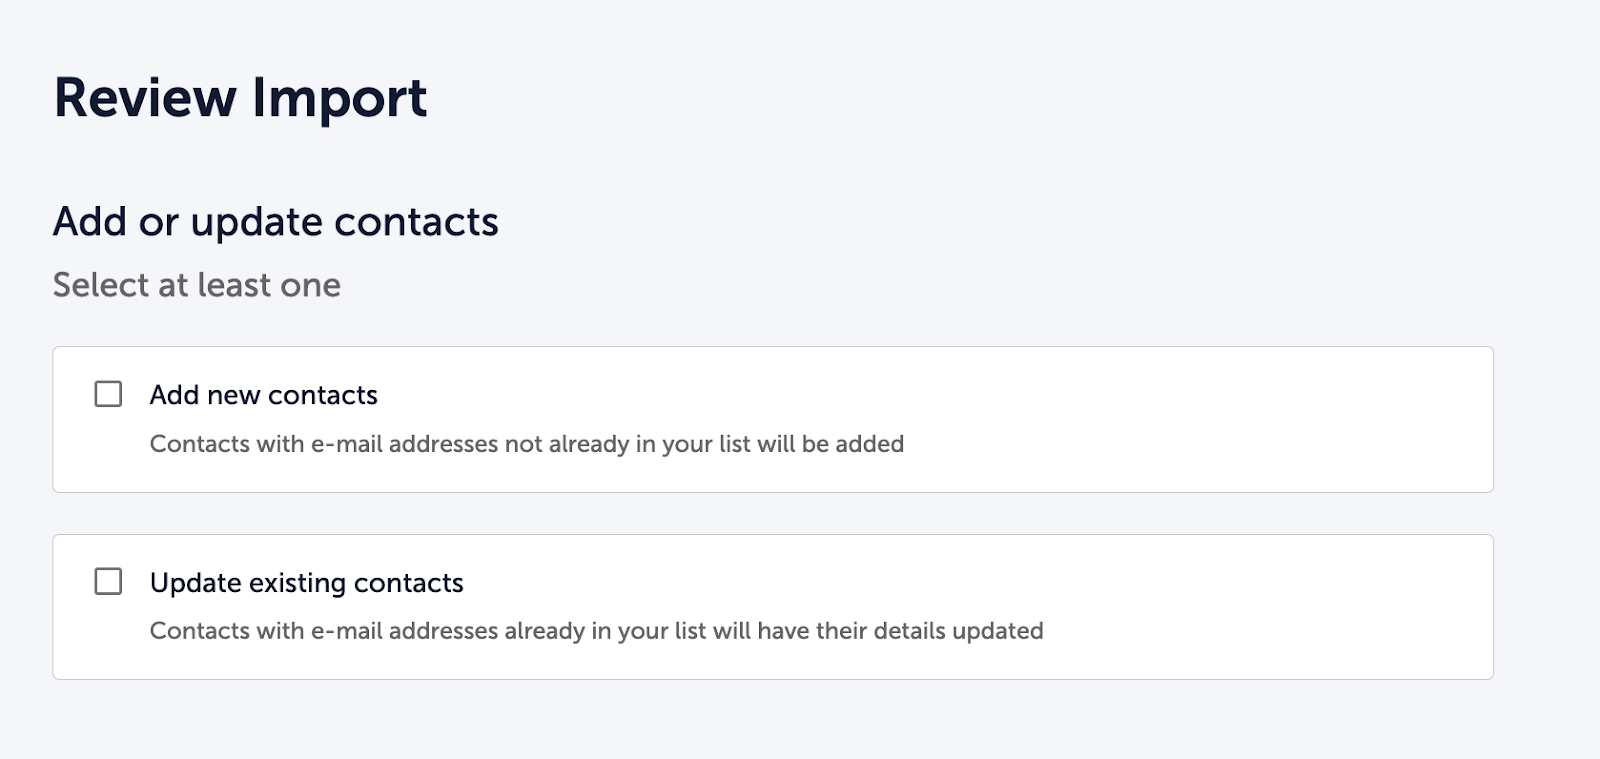
#7: Review Import Options
After matching your fields, you will see a Review Import screen with two options under "Add or update contacts." Select at least one:
- Add new contacts: Contacts with email addresses not already in your Database will be added as new records.
- Update existing contacts: Contacts with email addresses that already exist in your Database will have their details updated with the data from your CSV.
You can select both options to add new contacts and update existing ones in a single import. Selecting both options is common for recurring imports where your CSV contains a mix of new prospects and returning contacts with updated information.
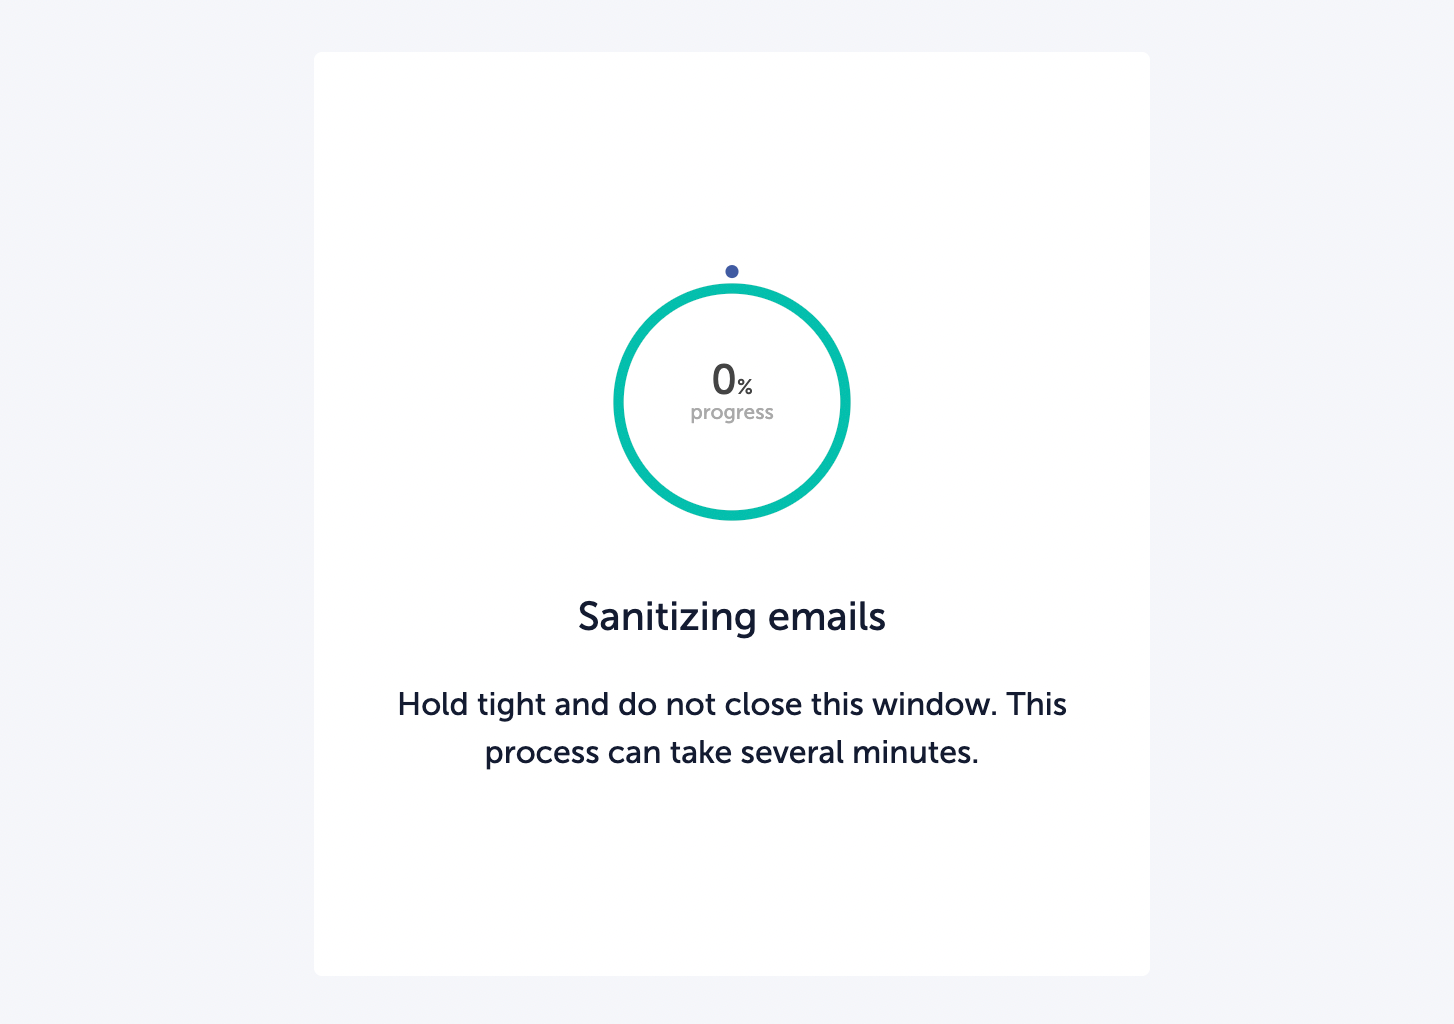
8. Sanitization
During import, the system runs a sanitization process that checks all email addresses for validity. This helps maintain a clean list, which supports higher deliverability rates. Processing time depends on list size. Small lists may complete in a few seconds. Lists with thousands of records may take up to an hour or more.
Do not close your browser window during this process.
This validation step protects your sender reputation by filtering out invalid addresses before they enter your Database, which directly impacts deliverability when you send communications through Interaction.
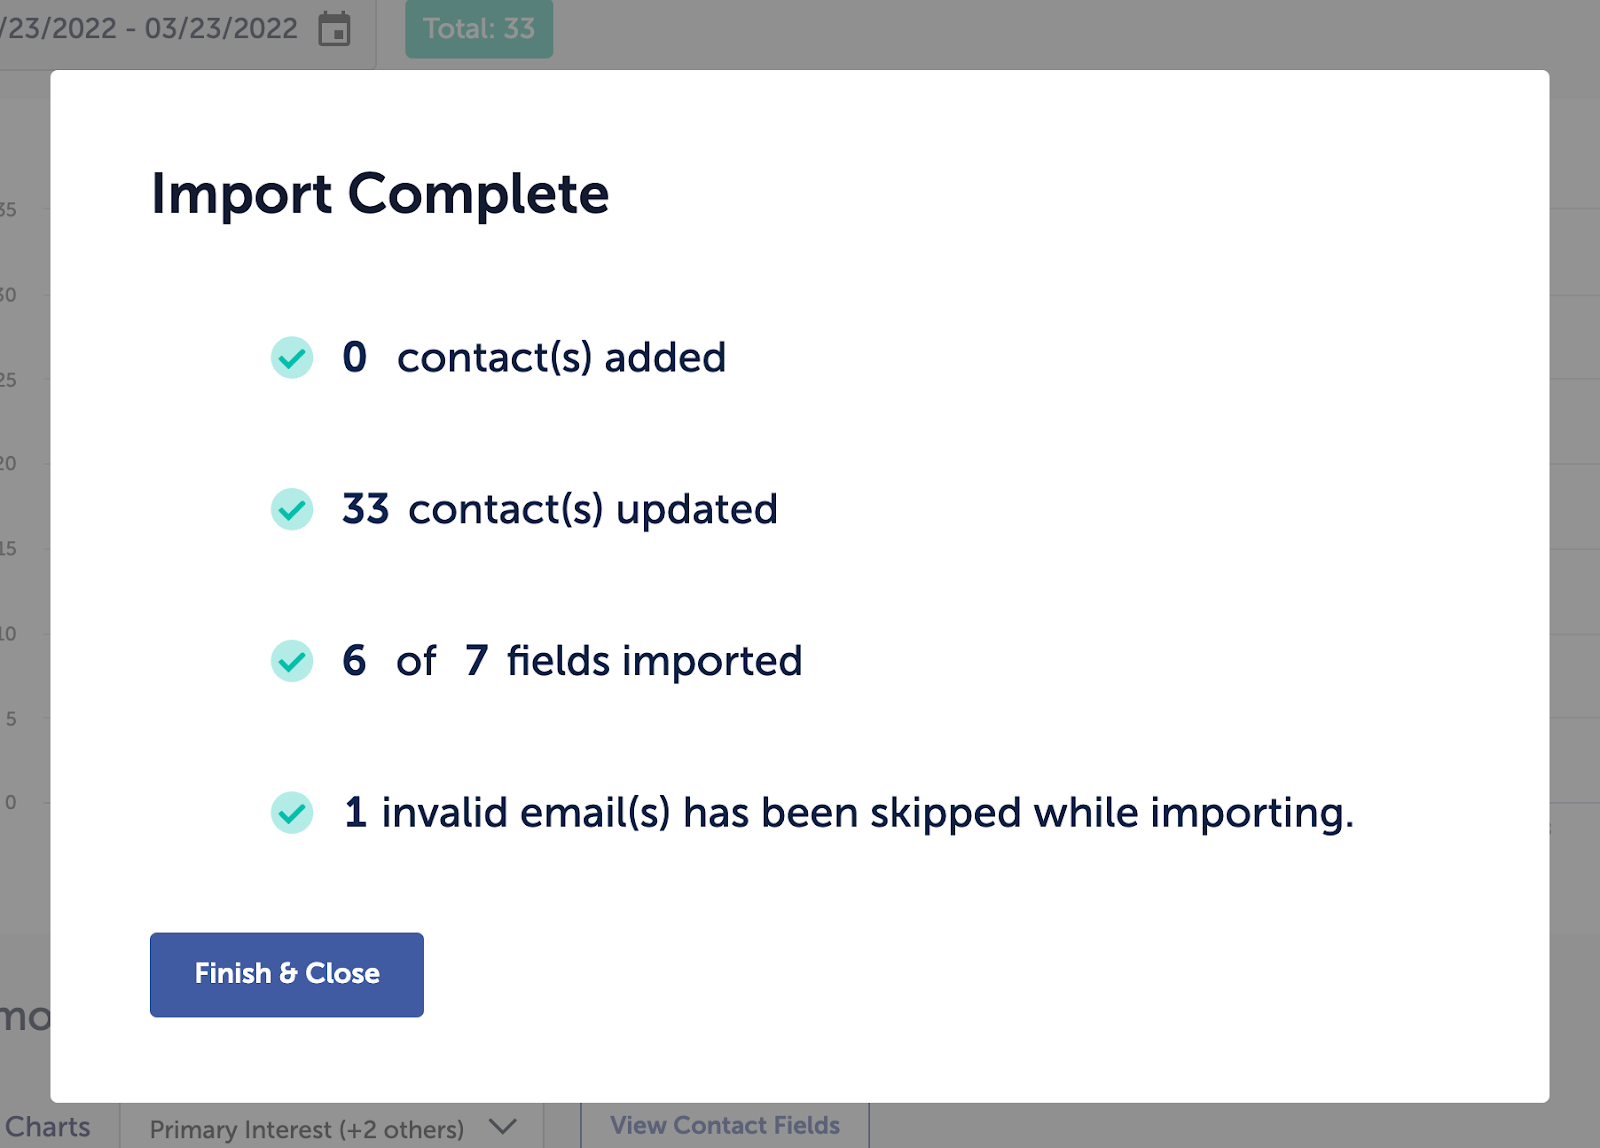
#9: Import Confirmation
After sanitization is complete, you will receive a confirmation message showing:
- The number of valid records
- How many contacts were imported
- How many contacts were updated
If the number of fields imported is lower than the number of columns in your CSV, check whether any columns were set to "Ignore Column" during field matching.
Completing all preparation steps before importing (suppression list, file formatting, field alignment) is what produces clean, accurately mapped records here.
What's Next
After importing your contacts, you can begin building segments based on the data in your Database. See Building & Managing Segments.
To learn about collecting additional data from new contacts through landing pages, see Primary Interests: Foundational to Segmentation and Building Landing Pages.